

Arweave Manifests: How to get your NFT Project, Static Website, or dApp onto Arweave
Article
What is a Manifest and Why is it Important?
Definition: Arweave manifests allow you to take a group of transactions IDs for data that lives on Arweave and reference them with a single transaction, followed by a friendlier path name.
What are the benefits of Arweave Manifests?
Host a static site, and manage it with friendly path names
Organize NFT collection with one transaction ID for multiple (1000s) transactions
Host a dApp (Decentralized App) on Arweave
ArFS (Arweave File System): The Power Behind Manifests
ArFS is the core technology layer that the ArDrive team built which allows a mutable (changing) hierarchical file system on the immutable (unchanging) Arweave protocol.
Allows us to upload, download, and browse data via drives, files, and folders
Allows metadata tagged to the file to be changed
ArFS is the perfect pairing for manifests as it gives users the ability to get data organized the way they want it, create a drive structure, and use a common transaction ID.
Here's a demo of with ArDrive CTO
Preparation: Before you create a Manifest
Preparation: Before you create a Manifest you must upload the files you want into your manifest onto ArDrive
To upload files onto ArDrive:
Create a Drive on ArDrive
Add/upload a folder to that Drive
Upload your files that you want as part of your manifest to this folder
All of these actions can be preformed by pressing the +NEW button in the top left corner of your ArDrive dashboard.Here is our full tutorial on how to create drives, folders, and upload files.

How to Make a Manifest Using the Web App
End goal: One common transaction ID, followed by each file name, as we have uploaded it onto ArDrive
Example:
https://arweave.net/Bgw5-GwpymUoe5VMeb-No9WWXpjWsq_8g4oeiGP5RnA/0.png
https://arweave.net/Bgw5-GwpymUoe5VMeb-No9WWXpjWsq_8g4oeiGP5RnA/333.png
…rather than opaque Arweave transaction IDs that ordinarily reference your data:
https://arweave.net/ISvPQyG8qWzJ1Pv5em5xK8Ht38HZ3ub1fPHbFEqDPK0
https://arweave.net/nHuFsR2Y-e_qtnsmj0avn37CTWxlZ4zvG_CKwtldK3I
Go into the folder that has the files you want to create into a manifest
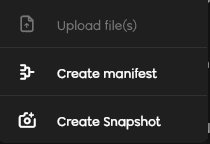
Hit the +NEW button and then click Create Manifest
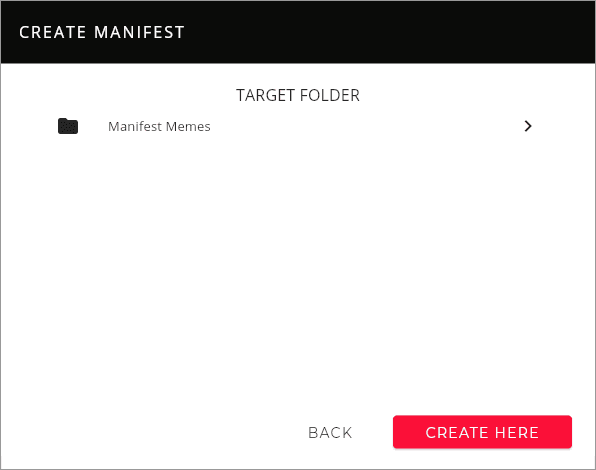
You will then be prompted to give your Manifest a name

Choose the Target Folder that you want to create a manifest from
You will be asked to pay for the manifest – most manifest will cost less than a penny!
Pro Tip: It will chose index.html if it exists, otherwise it will arbitrarily choose the first file found
After the manifest is created in a few minutes you will now have a common transaction ID for all of your files with a friendly name
Final Results:
We’ve taken a set of TX IDs
We’ve placed them in a common TX ID (manifest ID)
We’ve used the files’ ‘friendly names’ to access them at common base
How to make a CLI Manifest

The ArDrive Command Line Interface (CLI) was intended for use for power users with advanced workflows and resource efficiency in mind: bulk uploaders, those with large storage demand, game developers, NFT creators etc.
The CLI gives extra utility out of the manifest.
Here is what you will need to get started with the CLI to use manifests:
Install Yarn 2 to manage dependencies and initiate workflows
Start the CLI with:
yarn ardrive
Our whole CLI documentation can be found on our github account
The relevant commands for manifests on the CLI are:
yarn adrive list-all drives - w demo-wallet (wallet)Gives us our driveID and rootfolderID
yarn adrive list-folder -f "rootfoolderID"yarn create manifest -f (folder ID) -n “what you want to name the manifest” -w (wallet address)
Pro Tip: enter - yarn ardive to list all of the commands you can preform
Pro Tip 2: yarn ardrive create manifest -h , which is the help flag this will show all the options we have when we create a manifest
Pro Tip 3: Use the --dry-run flag to see a preview of the manifest file before you upload it to Arweave.
Results: will show manifest with transaction and each of those transaction with a friendly name at the end
Documentation: https://github.com/ardriveapp/ardrive-web
This level of manifests use requires coding abilities, and we have the resources to help!
For deeper integrations with the ArDrive platform, use the ArDrive Core (Node) library’s configurable and intuitive class interfaces directly within your application.
Fun Fact: ArDrive price calculator is an app that was built using manifests.
Resources:
Core-js: https://github.com/ardriveapp/ardrive-core-js
CLI: https://github.com/ardriveapp/ardrive-cli